Tuesday, June 30, 2015

Leaping into the Periscope World!

Hello Journey Friends!

Have you heard of the App Periscope?  Well, it's a LIVE broadcasting app that is so fun!  I've been watching several of my favorite cookiers (yes, I decorate cookies too) do LIVE cookie decorating and I decided I would try doing a stamping session live on Periscope.

How fun!  I'm not sure how well my first go-round went, but I did have 60+ viewers from all over the world watching and listening.  I didn't notice any comments, but I was really focused on my stamping.  HA HA.  I'm not sure if they were seeing things well or if they saw anything at all because my internet can be pretty wonky in my craft cave.  I did create a card, so I'm sharing that here with you today.
Yep!  I created this card on my first LIVE PERISCOPE session!  It took 15 minutes from start- to finish!  I even demoed my new Journey Punch and the Chevron punch.  FUN!
 The amazing stamp set that was used is called "Scenic View".  I got this set specifically for the marathon runner!  I LOVE this set!!!  I think it works really well with the chevron punch!
I hope to do another live Periscope card making session again tonight.  If you would like to watch/chat, please "friend me" and load the app on your phone.  :)  It's fun and FREE!!! (My name is KerryU on Periscope!)

FSJ Items Used:


Non FSJ Products
Kraft card base
Graph Paper remnant


Monday, June 29, 2015

Santa Baby!

Hello there Journey Friends,

I'm back again to share a "Clean-and-Simple-ish" card using the soon-to-be released set Jolly Friends. 
I suppose you also notice the new embossing folder image on the Lemon Grass cardstock! WEOOOOO!  Yeppers, that's called Happy Holidays and it's available NOW!  I love how it adds some fun texture to an otherwise FLAT card!  
I also stamped the ho-ho-ho sentiment repeatedly with Rich Coral ink onto the Rich Coral cardstock. I also punched the new tag punch out using Whip Cream cardstock.  A teeny scrap of Pool Play and Oatmeal Cookie cardstock placed in the middle helps separate the embossed and stamped papers. Paper piecing the hat (From the soon to be released Snowman Fred ATS) was fast and easy.
I popped the hat up on a tag diecut (from the new Tag Time punch) that I embellished a bit with a piece of cardstock and some Whip Cream thread.  Finishing it off with a little Journey Glaze and Sparkle Dust and a pretty flower from the Holiday Elements shows that someone other than SANTA is wearing that hat!  :)

FSJ products can be purchased through my shop HERE or by clicking on the highlighted items in my blog post.

Interested in becoming a Coach?  I'm looking to find a few fun and creative stampers to join my team.  Please contact me to find out more or visit my shop to sign up today!  JOIN MY TEAM!

Sunday, June 28, 2015

My Photo Set-up

Hello Journey Friends,

Many friends have asked me how I take my photos for my card creations here on my blog.  I'm here today to share my high-tech set-up and explain a bit about my process.

The photos I'm about to share with you are unaltered (except for watermark), straight out of the camera photos.  I'm showing you these so you can see the before---and after.

My camera is an older Canon Xsi with the standard stock image stabilization lens.  I take my photos on Manual mode.  I'll show a snapshot of the photo details below each picture.

This is my workspace.  I work at an old kitchen table that sits in my spare bedroom.  It's pretty dark in there, and I rely on the light on the desk as well as two torch lights that are positioned on either side of the table.
When my cards or projects are ready to be photographed, I place a piece of watercolor paper flat over my workspace and position the rest of the pad (with the hard cardboard backing) up against my markers.  I also place a piece of this paper along the right side edge.  As you can see here, I have one of my favorite backgrounds also set up.  I often use backgrounds that compliment the cards or themes of the cards.  I also use sparkly cardstock in the background and felt, embellishments, trinkets or a piece of glass from a photo frame (for reflection) on the bottom.  The task light (with a white OTT Lite) is positioned directly over the project.  
When taking pictures, I sit almost eye-level with my camera so that I can take a head-on shot.  I look through my viewfinder and adjust the objects to my liking.  Most of the time, I take a photo with the card facing at an angle to the right.  In this particular setting, I wanted to photograph a collection of similar items so I raised one of them up on stamp blocks to give additional height in the picture.  I teetered the other one off the edge of the blocks to give additional purpose and function to my "props".  I do this as well when I pile sand, rocks, gems, sequins, etc.  
After taking the whole frame shot, I focus on two additional close-up shots.  You've probably noticed that when I post a card on my blog, I show three photos.  The whole, and the two close-ups.  I think this allows me to be able to explain details by including a visual reference for my readers.  

Sometimes, as with this image, I apply gloss over areas.  When I do this, I want to make sure that shows up so I tilt my card/project or tilt my light source to create reflection on the gloss.  This reflection will show up in my photos.  
 You can also see that I take a tight shot of the bling or ribbon elements.  I just like to see sparkle!  ;)
Alrighty, so now that those three photos are taken, I load them on my computer and head over to www.picmonkey.com for editing.  I only do a few edits.  

1.  CROP the image.  
2.  ADJUST THE EXPOSURE to brighten the photos up and increase the contrast just a bit.  
3.  ADD OVERLAY EFFECT (usually FROST and/or FOCAL B/W).  Sometimes I add a LENS FLARE or STAMPS but that's rare and only for special projects).
4.  ADD WATERMARK (I tend to have a few favorites and always try to use the same watermark effect for the collection of photos in this series.  

So now are you ready to see the final photos???


I hope this information is useful to you!  Thanks for stopping by!  Tomorrow I'll be back to regular scheduled crafty posts!  

Do you wanna build a snowman???

Hello again Journey friends,

As I shared yesterday, I made a collection of cards to send to the Fun Stampers Journey Crew (the staff at the Journey Station) and this is the second version of the card collection I'll be sending.  I loved the pattern and colors in the new Holiday Mini printed paper pack so I knew that was the color pallette I was going to pull from. 
It was so fun using the Brush Strokes set to create a background full of snowballs!  The River Stone cardstock and ink worked perfectly with the Pool Play ink and paper.  MMM...I used some liner tape and Black Licorice satin ribbon to create a frilly contrast against those masculine stripes.  
Isn't he the cutest little snowman?  I soooo love the Jolly Friends Set!  I think it'll be my GO-TO holiday set this year.  It just makes me smile!  
 Of course, you know me!  I've gotta add a bit of sparkle somewhere!  I added Sparkle Dust and Journey Glaze to the blue stripes on his scarf and added a large Sparkle Drop on the Whip Cream thread bow.  MMMM...

And, yes, I did an oops again!  Cut my stamped background too small while jammin' to some Frank Sinatra...HA HA!  Yeppers, I had a little jazzy accident.  Turned out just fine in the end!  LOL
 This is the other snowman's twin brother.  I think they're identical twins...Well, maybe not their noses...I doodled the lines on them so they're probably a tad different.  Go ahead compare, I know you want to.  ;)
 Yummy!

Stop back tomorrow for another peek at a Christmas in July creation.   This time, it'll be something Clean and Simple-ish.  HA HA!

Saturday, June 27, 2015

Ho Ho Ho...

Hello there Journey friends,

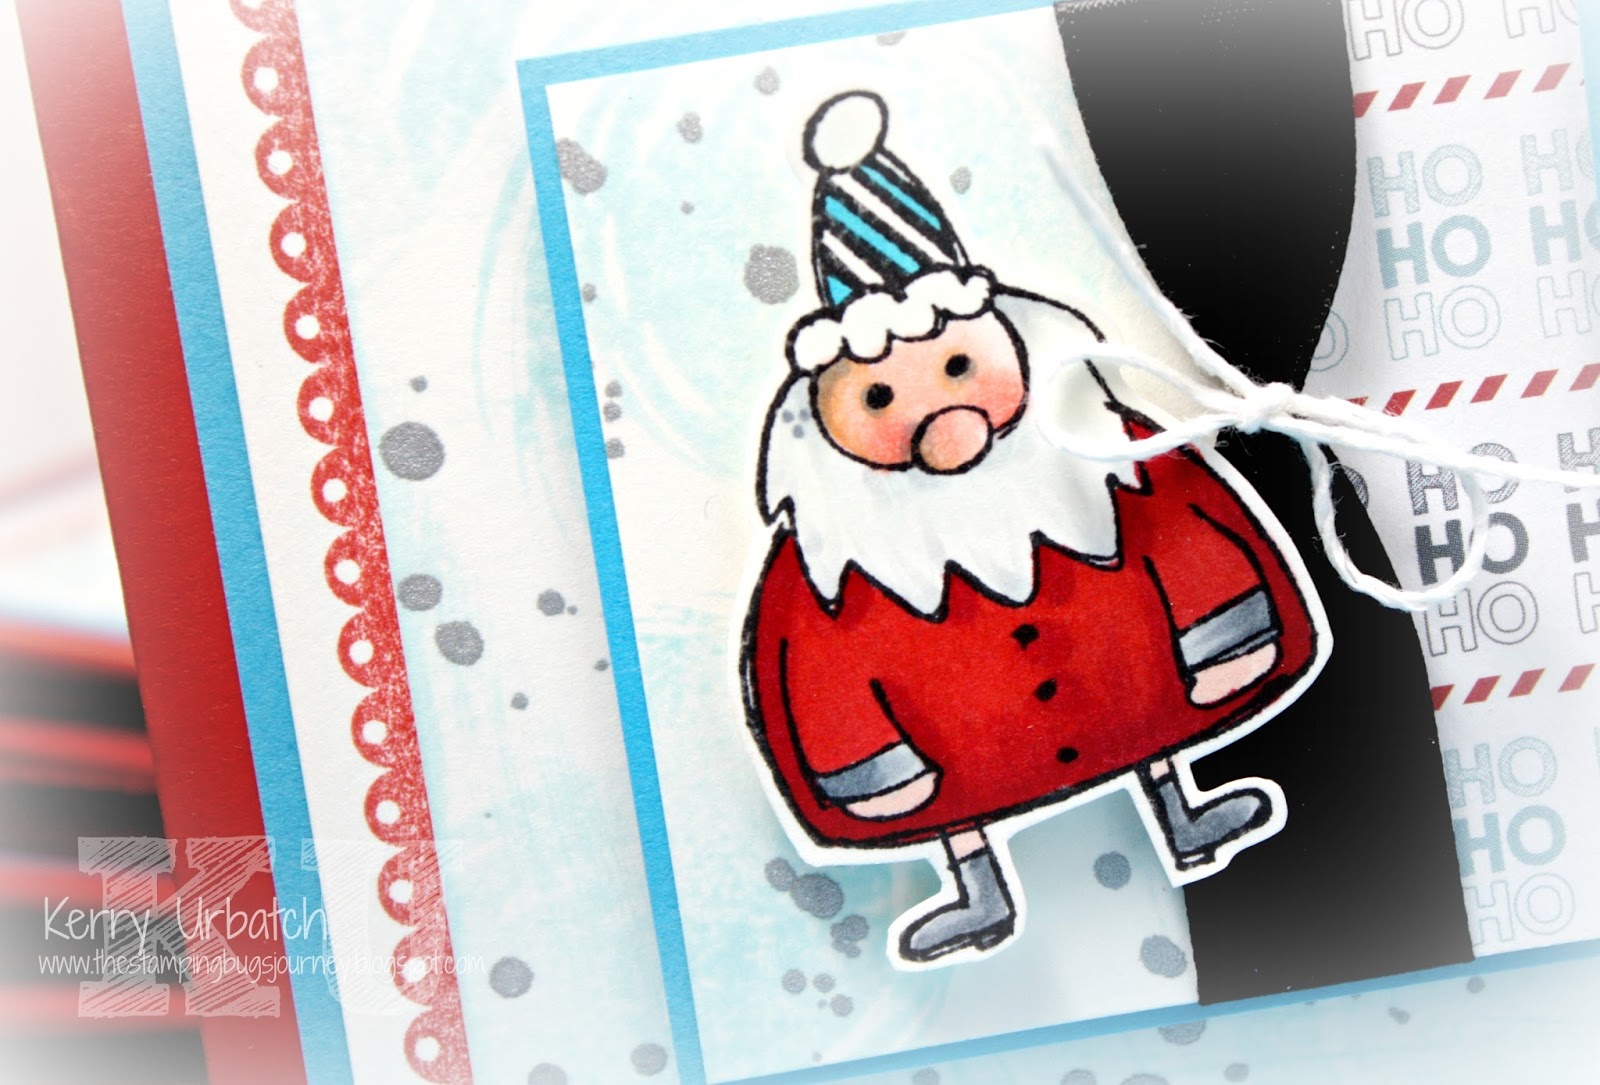
I've been having a ball playing with the new Jolly Friends set!  I decided to make a collection of EIGHT yes, EIGHT of these adorable cards to send off to the fabulous Fun Stampers Journey Crew members in Arizona.  I've got more to reveal, but thought I'd share these first.  I just LOVE coloring this little Santa Rolli-Polli!  
Such a fun little plumpster to color!  He just couldn't wipe the smile off my face as I was coloring away!
I mean, come on...LOOK at those tiny little boots! I can imagine he weebles when he wobbles!  Hee hee...
 
 Oh yes, I DID snip the ho ho ho sentiment up just a bit.  I wanted to stamp the ho three times vertically, so I snipped one Ho from the ho, ho, ho and there you have it!

Here's the second version.  Well, it kind- of was an oopsie...You see the patterned paper?  Well, It was cut the wrong way so I had to turn the trading card horizontally to work.  I still love how it turned out.
 Notice the little scalloped edge?  I used the ribbon stamp in another stamp set called Stitched Borders.  I love to use the stamps in that set this way!  So perfect for that little tiny border element that gives the card the perfect punch!
And notice all that splatter!?!  MMM...I love Silver Silk!!!  And peeking out from the background, you can see the new Brush Stroke stamp set.  I love how the lightly stamped circles helps unify the whole card.  
Ho, Ho, Ho...

I hope you're enjoying my sneaky-peeks at the newest stamp sets and paper collections.  They'll be available for purchase on July 1 when the Holiday Mini Catalog is revealed!  In the meantime, visit my shop HERE to shop for other new goodies from our AMAZING new catalog!

PS...I'm looking for a few fabulous stampers and friends to join my team.  If you are interested in joining this amazing journey, please contact me to learn more...or...visit HERE to sign on today!

Friday, June 26, 2015

Woo Hoo!!!

Woo Hoo!  It's avaiable!!!!  I'm excited to add this fun punch to my tool collection.  All the punch dies store nicely in the handle!  :)  Head right over HERE and pick yours up!!!


Jolly Friends...

Ho-Ho-Ho!  I had such a great time creating this adorable tiny bag for some cookie treats!  Jolly Friends is a brand new holiday set that will be released July 1.  Along with this set, the 6x6 Holiday printed paper pack will also be released.  It's such a fun paper pack with itty-bity images that are perfectly sized for the cardmaker and trading card artist in mind!  I LOVE IT!  
Adding a bit of sparkle was easy with the Sparkle Dust and Journey Glaze.  I added it to the "snow" and to the snowflakes that are falling.
This little Santa was fun to color too!  I distressed him up a bit with Oatmeal Cookie ink so he would fit nicely with the theme.
Do you think Santa's been nibbling a bit on the cookies in the gift bag??? Hmmmm...I'm going to have to check it out!  

If you're interested in receiving the Holiday Mini Catalog that will be released July 1, please let me know.  Be sure to check my shop out too.  Verified purchases from my shop will be eligible to receive a free Holiday Mini Catalog.  SHOP HERE!

Join my team!  If you are interested in becoming a new Journey Coach, NOW is the time!  When you sign up this June, you'll receive a box of NEW Inspiration Catalogs AND the JUNE Kit of the Month (FREE)!  You can also customize your Coach Kit order with stamps, dies and inks that fit YOU PERFECTLY!  Join my team today!