Showing posts with label Liquid Color. Show all posts

Wednesday, December 20, 2017

Merry, Merry Christmas!

Hey there crafters!  I'm making a mad dash to finish my Christmas cards and I think I finally see the light at the end of the tunnel!  While some of my cards won't make it to their destinations in time for Christmas, they'll be out the door before then and I'm happy about that!  Heck, it's kinda fun when I receive a card in the mail after all is said and done!  

I created this card using some Cranberry Bliss ink on my Gel Press and then I rubbed a bit of water on top of it with my finger.  Since it is an oily ink, the water and oil didn't really want to get along but I pushed them to "LOVE ONE ANOTHER".  Once they were "blended", I used a tissue to blot some of the really juicy areas so that my cardstock wouldn't get too oversaturated.  I layed the cardstock onto the Gel Press and rubbed it a bit then lifted it off to reveal the fun textured surface.  I opted not to add any stamped impressions this time because I wanted to apply the "texture" using my sewing machine.  
I machine stitched some meandering lines onto the cardstock then applied some Silver Sparkle scalloped washi tape and a thin scrap of Candy Apple Red cardstock.  I stamped the alpha letters (to spell Merry) using the Outline Bet stamp set and Black Licorice ink then fussy cut them using my Pro Shears.  While this stamp set does have an available coordinating die set, I tend to love my cuts a little closer to the line.  I opted NOT to use the diecuts this time so I could get pretty crisp and close to the stamp line.   I love these little scissors for super fine and precise fussy cutting.  After they were cut out, I used Sparkle Silk to paint over the letters for some shimmer and shine.  I also flicked a bit onto the cardstock panel.  
Assembling the festive "swag" and adding snowflakes was next.  I threaded a wooden heart button onto some Natural Thread and then draped it across the page.  I adhered the button to the Snow Blooms Snowflake diecut (colored with Liquid Color on the Gel Press) on the right with a foam square.  The red/white bakers twine was tied off in a bow (around the foam square) and draped in the same manner.

To finish the card off, I assembled the "Merry" sentiment and added some styrofoam snowballs and a few punches of silver cardstock, added some pearls and mounted the whole panel onto a Kiwi Slice piece of Cardstock.

Such a fun card and I'm one more card to the finish line!  WOOP WOOP!

Sunday, July 9, 2017

Sunday Sip and Share...Coffee, Ink and Clay!


Hello there Coffee-Loving friends!  It's Kerry here and I'm back with another Sunday Sip and Share...This week's inspiration comes from a gorgeous soda fired Yunomi that I acquired from a talented potter I follow on Instagram.  I'm quite addicted to coffee as you know but I'm equally additcted to fine pottery mugs and Yunomi (ceramic tea/drink vessels without handles) that are handthrown by amazing artists worldwide.  I have amassed a nice collection and it grows even more monthly!
This beauty is on the way to me from the lovely Samantha Hostert @shostert a potter and teacher who resides in Chicago.  She was in my area (with this Yunomi) and even posted a shot of it on the grounds of George Washington's Mt. Vernon.  I was thrilled to see her in my neck of the woods and quickly went to her Etsy shop.  This beauty, forever shall be called Mt. Vernon and shall return to visit George and Martha often!
So...This cup, and more importantly, the bleeding/drippy glaze, inspired my card creation today.  I did a bit of doodling (as did Samantha) on a hand formed mug (heehee) and then added watercolor in a messy/bleeding fashion.  I love how it mimicked the design of the stamps too!  
What do you think?  Do you like it?  Do you like how the browns separated when I watercolored it?  I used Fun Stampers Journey Liquid Color and felt like I was a glaze mixer...taking parts of red, yellow, blue and a little more red and a little more yellow to make the brown just coffee-licious...Then...When I applied it to the paper, it had this magnificent reaction and the colors separated and danced around on the paper like a fantastical magic show!  Just like the magic of taking a fired piece out of the kiln!  It's awesome!  Oh yeah, I have had a few runs of firing my own pottery...and I miss it so much!
Now the stamp design in the background...Well, I love this new doodly set called Chosen Family from Fun Stampers Journey.  It reminds me a lot of the Scandinavian linens that my grandma had.  I stamped the solid flower first using a tone on tone theme with the solid stamp and Oatmeal Cookie Ink then overstamped the pattern using Black Licorice (and the outline image).  So yummy!  I mimicked the design of the outline stamp on my hand-doodled mug.  I think it works well.  Adding some embellishing touches like Licorice Sparkle tape, a strip of brown cardstock and some Natural and Black Twine and pearls helped finish the card off.  I also glossed up the cup with Journey Glaze.  SO SHINY!
So now let's get to the sketch!  Yes, I created a coordinating sketch inspired by my card today and I invite YOU to play along with it!  Just create a fun card using this sketch as inspiration and upload it here to our inlinkz.  At the end of the month I will choose one winner who will receive a fun coffee-lovers prize!


Thursday, July 6, 2017

Give it a Go...Didn't make the Cut!

Hey there Journey Friends,

Today I'm beginning the massive share of a selection of projects I created to submit to Richard Garay's Designer Showcase.  I was excited when he announced the call and started working on some special projects immediately.  I compiled all my projects into a gallery on my team FB page (JOIN TEAM ITCHIN INKERS TODAY!) so that I could get the input of my fellow team members who would then vote on the ones I should submit.  It was important to me to get their input and was my first stage in my project submission process.

Today I'm sharing the projects that "Didn't Make The Cut" by my team.  Although I LOVE all of the projects I proposed for this call,  I could only submit two cards and one scrapbooking design, so I am so grateful to my team for helping me make the final decisions! As with all of my project shares on my blog, I will share ONE PROJECT PER POST as they will include my creative process and additional photos.

Decisions, Decisions..This card did not make the cut but I wish it did.  I love it...It was my contribution for a "Masculine Feel".
To create this card, I started out by building a night sky background using my GelPress.  I used a combination of Butter Cream, Pineapple Smoothie, Cool Pool Acrylic Paint, Blue Lagoon Color Splash and River Stone Liquid Color to achieve the desired brayered background layers. Once the background was complete, I added additional highlighting and color using my GelPress as a painter's palette.  Spritzing the inks with a water filled Media Mister allowed me to maintain a fluid consistency throughout my painting process.  
Although the moon isn't a perfect circle (I did begin by using the circle die as a stencil), I think the highlighting and the Micron ink sketch lines helped with the illusion of a beautiful glowing moon.  I stamped the trees from Nature Grown Stamp Set onto the background panel to create depth and a beautiful night scene.  Before mounting this to the black panel, I rubbed a bit of Huckleberry Fusion Pan Pastel (From the Rich Sorbet Collection) on the edges to finish it off.
After the trees were stamped with Black Licorice ink I mounted this panel onto Black Licorice Cardstock.  My next step was to search for the perfect sentiment to go with this card.  I found it in the Color Cross stamp set.  Just adding that sentiment over a few spins of Natural Journey Thread made the card complete...BUT...I wasn't done yet.  I needed to mount this panel onto a card base so that it would shine!  I pulled a Pineapple Smoothie card base and stamped the cross using Pineapple Smoothie ink to give the background some depth and pattern and helped feature the focal panel.
 A little Pearl on the bow dressed this masculine card up just a bit.
Here you can see the texture achieved from the GelPress.  You can also see the sketchy lines I created using a micron pen...trying to mimic the sketchy features in the stamped images.

This has to be one of my most favorite cards created yet.  I love how it turned out and I know how difficult it was not to choose this one to share in the Designers call.

All of the items used in this creation can be purchased in my shop.  Just simply click on the items listed in my description and you'll be directed to the product in my shop!

Wednesday, July 5, 2017

Give it a GO...Part 2...

Hey there Journey Friends,

Today I'm beginning the massive share of a selection of projects I created to submit to Richard Garay's Designer Showcase.  I was excited when he announced the call and started working on some special projects immediately.  I compiled all my projects into a gallery on my team FB page (JOIN TEAM ITCHIN INKERS TODAY!) so that I could get the input of my fellow team members who would then vote on the ones I should submit.  It was important to me to get their input and was my first stage in my project submission process.

First, I'll be sharing the projects that "Made the Cut" by my team.  Although I LOVE all of the projects I proposed for this call,  I could only submit two cards and one scrapbooking design, so I am so grateful to my team for helping me make the final decisions!  After the three projects are entered tonight, I'll be back tomorrow to share the projects I created that "didn't make the cut".  So pop back over tomorrow to see them.  As with all of my project shares on my blog, I will share ONE PROJECT PER POST as they will include my creative process and additional photos.

So here's CARD #2.  It's a fun little interactive card that was a hit with my team.  I was worried about this card and was not quite sure whether to submit it in my gallery or not...but they decided...THIS WAS TO BE SUBMITTED...So I listened.
Want to see it in action???  Here goes (please disregard sound)
This was quite fun to create! 

I started out by coloring the ghosts from the new Party Ghost Stamp Set with Liquid Color.  After they were colored and fussy cut (yes, there is a stamp and die bundle for this adorable set), I added some Small Foam Squares to the back.  I then diecut a large Journey Circle (with pierced element added) onto the Pineapple-Smoothie Canvas- like paper from the Mystic Romance Prints Collection  I also diecut another circle using Whip Cream Cardstock so that I could use that as a spinner base.  
I laid the cardstock (distressed with Orange Rave Ink and a Dauber) onto the Black Licorice Card Base and punched a hole with my 1 1/4 inch circle punch.  I removed the orange cardstock and attached the Whip Cream Circle to the top flap of the card base using a small brad.  I tested out the spin action and then attached the Citrus Cooler Satin ribbon and then the ghosts.
I finished off the card by adding a punched circle with the sentiment (I cut the sentiment so that each word would stamp separately and so that I could stack the words instead of have them read as a complete sentiment horizontally).  One more test run and it worked again!  WOOP WOOP!  Next was to add the Journey Glaze onto the ghosts to make the paper a bit more sturdy...Wahoo!  Spin that wheel!

After the glaze was dry, I attached a tag (Tag Time Punch) and a few stamped ghosts (I used River Stone for a lighter gray image) and the sentiment using some Black Journey Twine and a few Sweet Candy Drops finished the card off.

All of the materials used in this project can be purchased in my shop.  Just click the items mentioned in my text and you'll go directly to my shop!  :)

Give it a GO!...Part 1

Hey there Journey Friends,

Today I'm beginning the massive share of a selection of projects I created to submit to Richard Garay's Designer Showcase.  I was excited when he announced the call and started working on some special projects immediately.  I compiled all my projects into a gallery on my team FB page (JOIN TEAM ITCHIN INKERS TODAY!) so that I could get the input of my fellow team members who would then vote on the ones I should submit.  It was important to me to get their input and was my first stage in my project submission process.

I'll be sharing the projects I created for this call.   Although I LOVE all of the projects I proposed for this call,  I could only submit two cards and one scrapbooking design, so I am so grateful to my team for helping me make the final decisions!  After the three projects are entered tonight, I'll be back tomorrow to share the projects I created that "didn't make the cut".  So pop back over tomorrow to see them.  As with all of my project shares on my blog, I will share ONE PROJECT PER POST as they will include my creative process and additional photos.
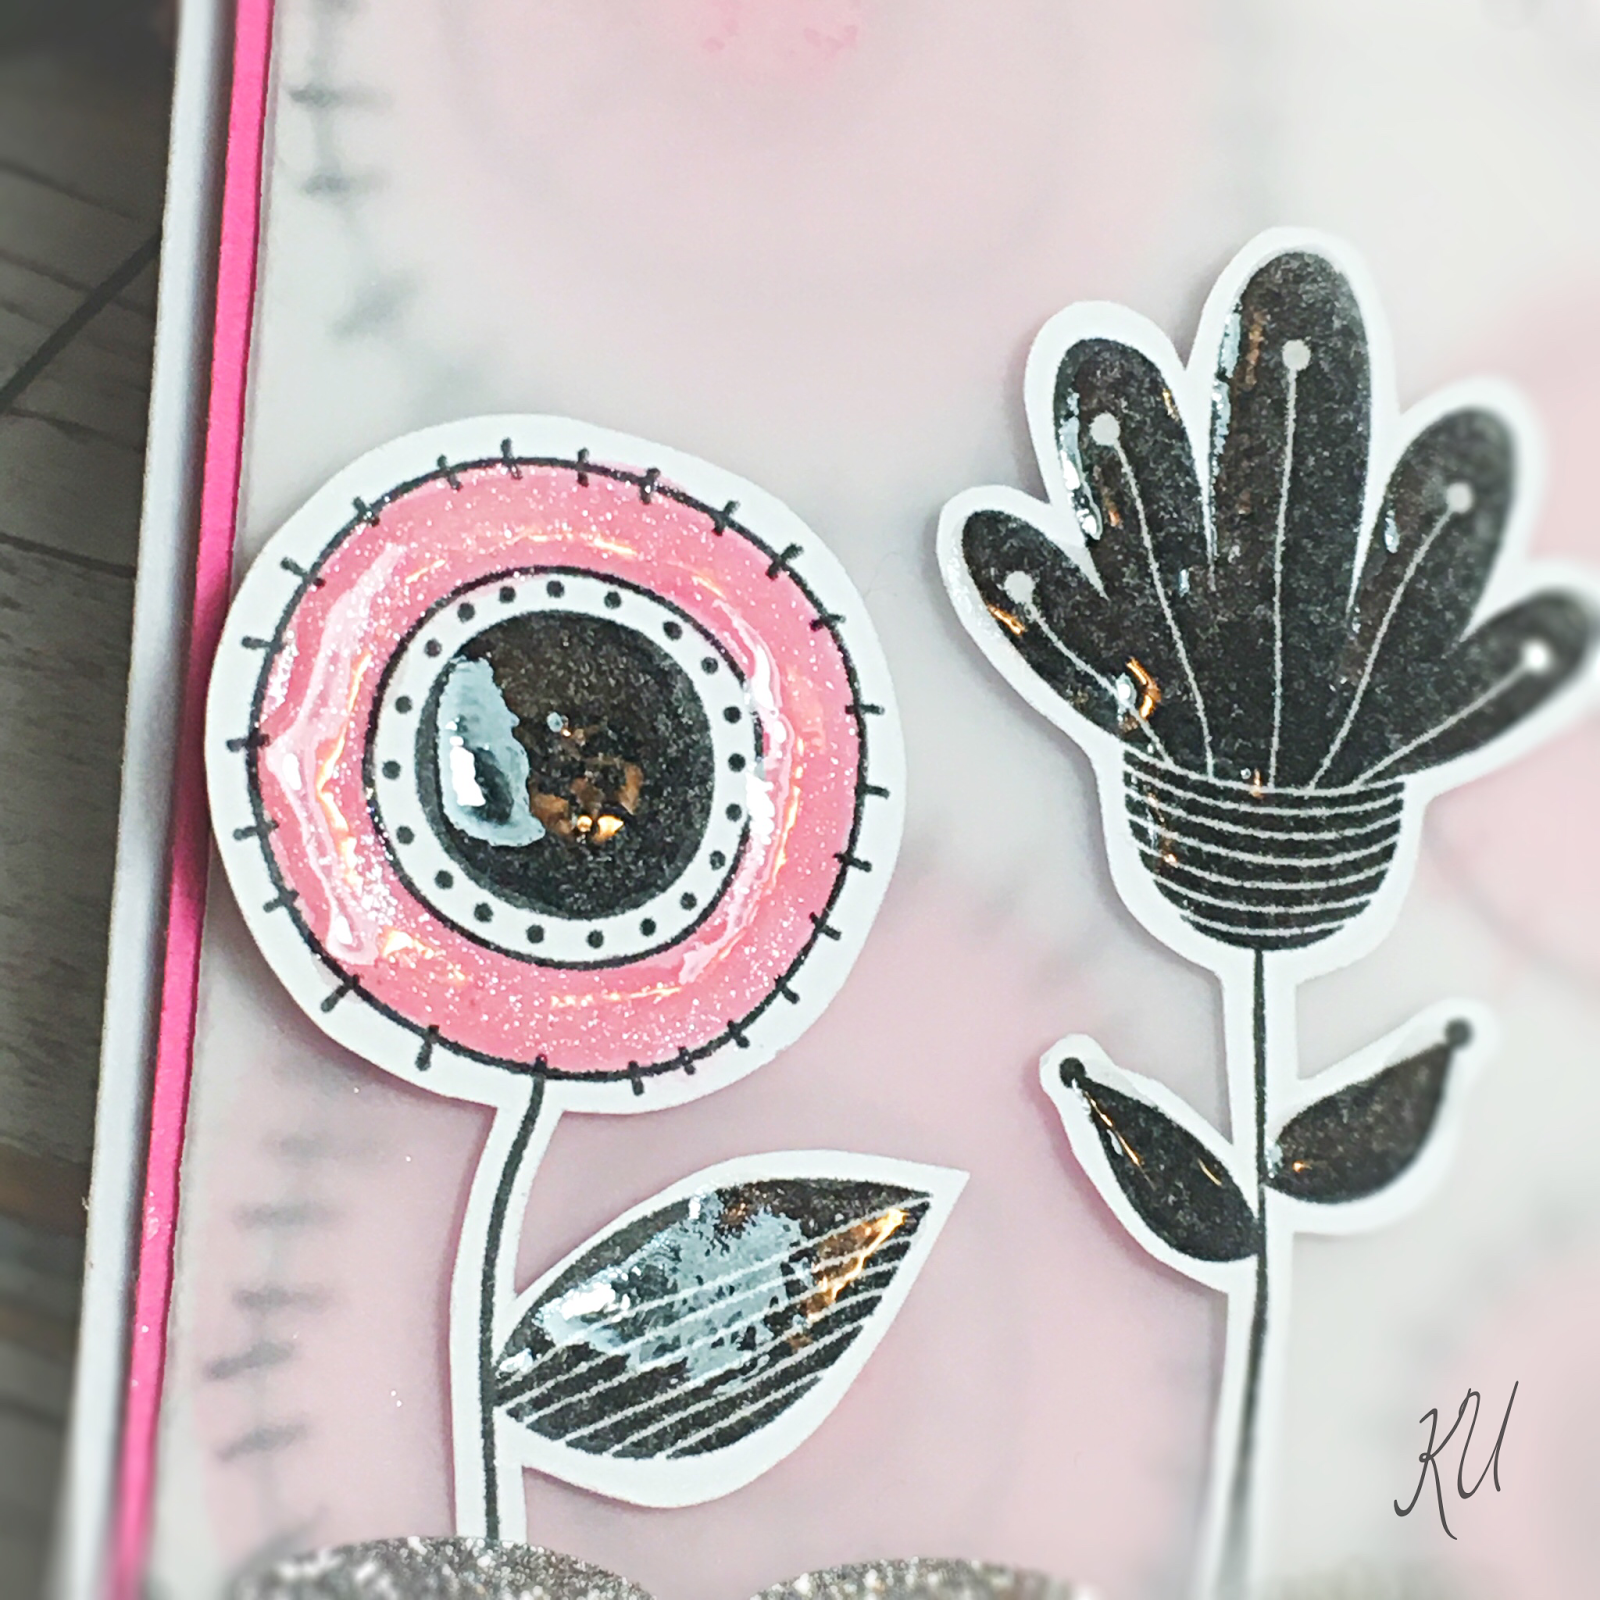
I LOVE the whimsical flowers in the Chosen Family stamp set and I just had to start out my creation process with this amazing set.  I focused in on the stitched circle bloom and decided I wanted to make a background with it.  SOOO...I cut some Ivory DMC floss and colored it with my new Bubble Gum Liquid Color. It colors beautifully!  
 Pretty awesome, right?
So after the thread was done, I painted circles on the canvas using Bubblegum Liquid Color and a Large Water Brush.  I didn't worry about symmetry and perfection because I wanted to maintain the whimsy of this design. I doodled some circles onto the Canvas Sheet (cut to size) and over the pink circles to mimic the design of the stamp using the Journey Silver Marker.  I love using Canvas Sheets when I'm hand stitching cards because the canvas is so giving it doesn't leave pierce holes like cardstock does.  It's a perfect surface for mixed media and fun ink techniques!  

After that, I took some of the pink thread and a needle and stitched some stitches onto the circle edges.  I did this with both the pink and black thread.  When the background was complete, I set out to create the flowers and the top layers of the card.  
I stamped the three flowers onto Whip Cream Cardstock using Black Licorice Ink.  I colored them with a mix of Bubblegum Liquid Color and Sparkle Silk.  This combination creates an amazing sparkle pink!
After stamping, coloring and fussy cutting the flowers (this stamp set is available with a coordinating die set too), I laid the flowers out onto the Vellum panel so that I could arrange a pleasing design.  I stamped the sentiment into position and attached the flowers with Small Foam Squares.
To finish the card off, I applied Journey Glaze onto the flowers and the sentiment, added some Silver Scalloped Sparkle washi tape and tied some Black Twine onto the bottom.  I mounted this panel onto Watermelon Fusion Cardstock and then attached the whole stamped panel onto a Whip Cream card base.  Adding a little pink Sweet Candy Drop finished the card off!
 All of the products featured in this card creation can be purchased in my shop.  Just click the items listed above and you'll be directed to each item.  Thanks so much for stopping by to check out this "Made the Cut" project.  I'll be back in a few minutes to share another "Made The Cut" creation!  Toodles!  

Tuesday, June 27, 2017

Pretty Posies and Liquid Color

Hey there Journey Friends, I thought I'd pop in to share a little card I created after reading the Fun Stampers Journey Blog today.  Richard's Tuesday Tip included a fun technique and a beautiful card featuring my ISU Cyclone colors so I just HAD to give the techinque a play and create a card inspired by RG's creation.  Check out his original post HERE.  Make sure to subscribe too.  You'll be glad you did!  
I used pretty much the same materials to create my version of his card EXCEPT...I didn't have any Cling Wrap so I used a plastic bag crumpled up.  I think it worked just the same!  I also added a few pretty embellishments and held restraint with my images and contained them to the central portion of the card.  Splashing a bit of Cranberry Bliss and Sparkle Silk onto the card added another yummy layer to this gorgeous design.  Hope you can see the sparkle washi peeking through too...just a tad bit to highlight the splashes of sparkle silk.  
YUMMY right?  This set has got to be one of my favorites of the new catalog and I'm so glad convention brought it to me!  I'm using it like crazy and I can't get enough.  You'll want to pick yours up along with your Liquid Color Bundle when the new catalog goes live for purchases on July 1.