Showing posts with label Coffee Lovers DT. Show all posts

Friday, December 8, 2017

Santa's Coffee Break..

Yahoo!!!  It's the most wonderful time of the year!  It's WINTER, CHRISTMAS and the WINTER COFFEE LOVERS HOP!  Woop woop!  I'm excited to be playing along again and I've got a fun project each and every day!  The DT has been cranking out some fabulous creations to inspire and invite YOU to join the fun!  

Join us throughout the week as we hop, hop, hop and share our awesome Winter creations.  Just make sure that they include the coffee, tea or hot cocoa theme and you're good to go!  As always, we've got a TON of fabulous Super Sponsors providing some amazing prizes.  Also, we'll have some Flash Prize Sponsors who will also be providing prizes that will be given away in a flash!

For my first card creation, I chose to share a little mixed media card I've dubbed "Santa's Coffee Break".  I included a little Santa Claus wax seal into my card design.  


Santa is always a child at heart so I've added a little doodled smiley face to his favorite cup.  Of course, Santa loves Peppermint any way he can have it so that yummy steam smells minty fresh!  

Check out the little snowballs!  I added a pile-o-snow to the canvas just by gluing them down with my Journey Glaze.  This glaze can hold down anything!!!  A closer look at the canvas might show a few sneaky Ho-ho-ho's here and there.  I wrote them in pencil on the canvas before I brushed some Whip Cream (mixed with a little blue watercolor pencil) paint over the canvas.  I didn't want the sentiment to be overpowering, so there's just a hint of "Ho".  

I wonder if you can notice the stitching under the watercolored snowflake?  If not, check it out.  I used some black twine and just xxx a little santa stitching.  Of course, I had to add a little sparkly and peppermint striped washi to the mix!  
Thanks for stopping by!  All products featured in this card are available in my Fun Stampers Journey Shop.   I've provided links to help make shopping easier!  Oh and the 12 Days of Christmas sale is going on RIGHT NOW!  Flat Rate Shipping of $5.00 is offered for your shopping experience.  So have fun and shop 'till you drop!  

Embellishments: Candy Apple Journey Tape, Black Journey Twine, Fashion Gold Pearls

Non FSJ:  Gold Thread, Styrofoam snowballs, Santa Claus Wax Seal, Gold Wax, Black Micron Pen


Sunday, June 18, 2017

Sunday Sip...Coffee and a Gel Press

Hello there coffee loving papercrafters!  It's Kerry here and I'm back from a brief hiatus from the blog.  I spent last week inkin' it up at the annual Fun Stampers Journey Convention in Chandler, AZ.  It was amazing and I'm excited to be back home to share new things with my crafty friends!  So much amazing packed into one week!    

I came home with the new 2017-18 Inspiration Book and Catalog, the 2017 Holiday Trends Mini, TONS of new product and endless fill of inspiration and memories...

I'm sharing this fun card set I created using the newest product partnership with Fun Stampers Journey.  On July 1, FSJ will host an exclusive 8 1/2 x 11 Gel Press and it's such a fun tool to create beautiful cards, backgrounds and embellishing elements.  SOOO EXCITED!
So, here you have it...These muted tone backgrounds were created using my new Gel Press. I incorporated a bit of FSJ Liquid Color (new to our color line-up July 1) and Acrylic Ink and the new Bubble Wrap embossing folder.  So fab!
This is quite CAS for me and my style but I love the cluster of embellishing elements that lay atop the Gel Pressed background panel strip.  
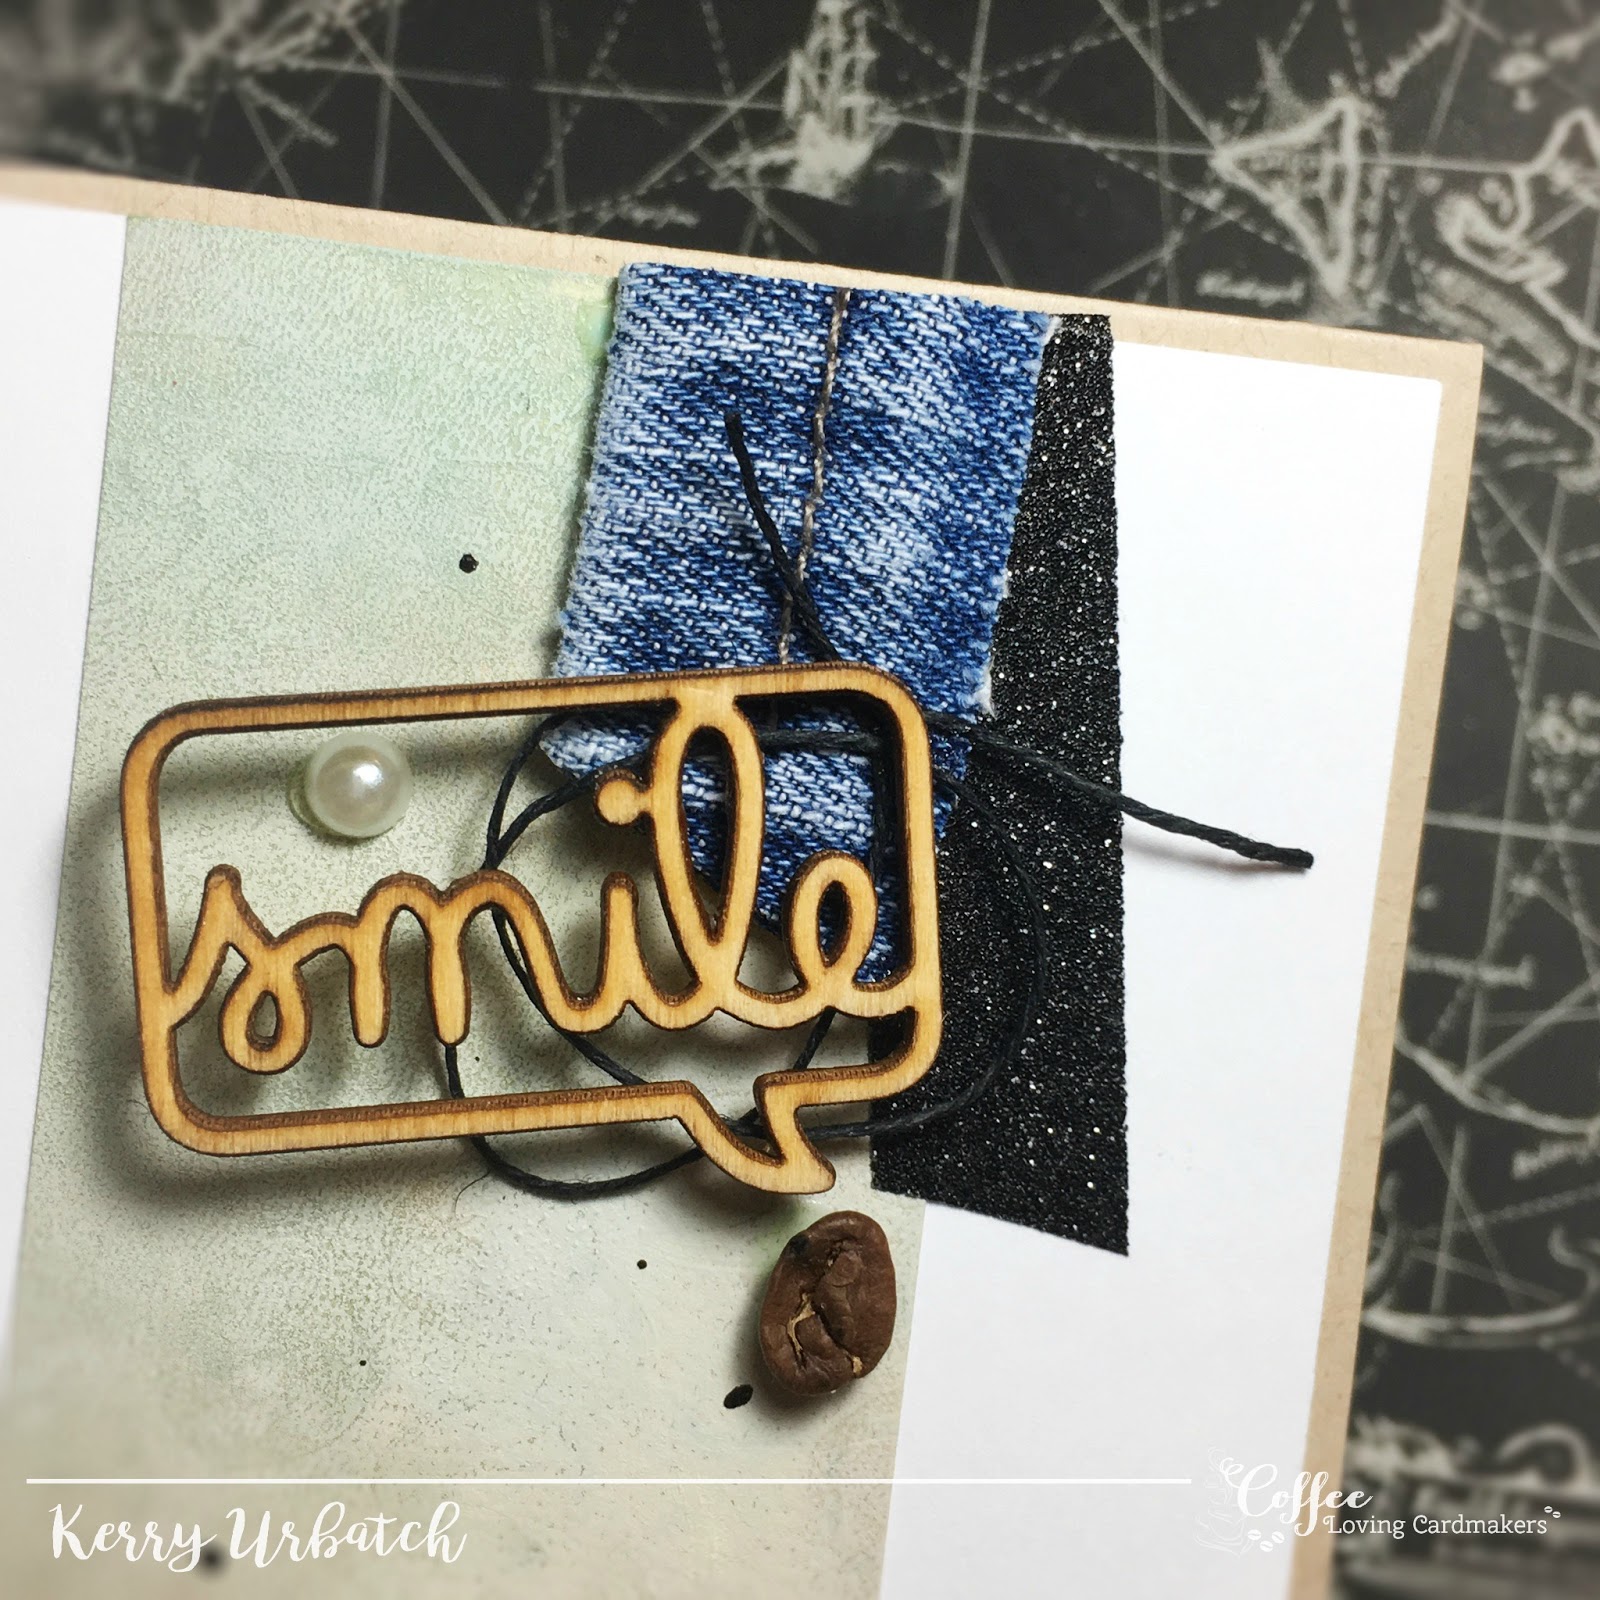
I had an old pair of jeans with a hole that couldn't be repaired so I just trimmed the hem off of one leg to create a fun strip of trim for my cards.  I love using jeans on my cards!  
The embellishments were a fun addition.  I have had the Word Bubbles for a while now and they made a fun appearance on the cards.  Of course I had to incorporate some yummy black Sparkle Washi and black twine!    A few flicks of Dark Roast Silk finished the card off... OHHH...I forgot, I also added a little coffee bean onto the card because it speaks my language.  You can understand them too, right?

Want to see my process to achieve the background?  Check it out!  
I added about six drops of each color into a mister filled with water.  I then spritzed some color onto the plate after dripping a few drops and brayering it onto the plate.  
 Brayering the two colors on helped me achieve the "coffee/tea" stain color I was after.
After that, I applied more drops of Lovely Blue, one drop of Catalina Splash and Orange Creamsicle Liquid Color onto my plate. I pressed the new Bubble Wrap Embossing Folder onto the plate to lift some of the ink.  
I pressed the card base onto the plate and rubbed it gently with my hand.  I lifted it up and this impression was left on my paper.  
I applied some clear pigment ink to the plate (so my brayer would glide over the plate) to help the ink spread like soft butter then added some Butter Cream Acrylic ink using my brayer.  After a few layers (and a few additional drops of Orange Creamsicle Liquid Color), I achieved the background I was looking for...Quite velvety, quite lovely, don't you think?  

Take a look at the sketch created from this card collection.  I hope you find some time to play along with it...Perhaps it will make an appearance in the hop coming up this week?!  If you choose to play along, please include a link to your creation by adding it to our linkup below.


Sunday, June 4, 2017

Sunday Sip...Tea Time!


Hello there coffee loving friends!  It’s Kerry here and I’m back to share a TEA creation for you.  I'm sharing this from my Sunday Sip and Share feature over at the Coffee Loving Cardmakers Blog! 

I’ve been very busy creating swaps for my Fun Stampers Journey Convention this week and you know what?  I’ve set my electric teapot (I have one right near my craft station!) four times today and I FINALLY stopped working to pour myself a cup!  LOL… When I’m on a roll, I just roll right on! HA HA!
My creating time has not just been limited to Convention swaps.  I've got Expo Booth projects in the works as well as other card making projects.   It's definitely a busy time of year!   I took a break to make this pretty coffee card that is being mailed out to a coffee-loving friend this week. Take a peek, won’t you?!
I created this card using the Tea Time stamp set from Fun Stampers Journey.  I also stamped and silver embossed the background using the stamp set Create-a-Dot. It’s a fun set with a linked circle and some added “fill in the dot” stamps.  So fun! The simple layout was made more “fancy” by adding some paper ruffles and some Twinkle Trim!
For an added touch, I stitched the tag element using my sewing machine and attached a little wooden Forever Heart Chips to the Glazed-up and Sparkle Dusted cup. Since this cup image came unfilled, I decided to add a little tea to the cup by doodling a tea line and watercoloring some of that yummy liquid.
The sequins were added because I just can’t seem to make a card without some sort of ribbon/bling!  LOL  Isn’t that silver embossing luscious?!
You bet I created a sketch to go along with this card!  If you’re interested in playing along with it, the JUNE #clcsipandshare gallery is OPEN FOR ENTRIES!  Please share your creation with us by adding it to our inlinkz below.  We’d love to see how you incorporate this sketch into your yummy creations! 


Sunday, May 21, 2017

Sunday Sip...Keep Calm!

Hello there coffee lovers! Today is my Sunday Sip and Share day on the Coffee Loving Cardmakers blog and I've got a fun little tag and sketch for you!  I hope you find inspiration in my creation and take a leap to join the fun in playing in the challenge!  The tag above features the yummy but retired set called "Enjoy Coffee".  It is currently in the Clearance Sale going on right now and you can pick up this awesome set for less than 9 (while supply lasts).   Once this set is gone, it's gone FOREVER!
Have you noticed that I have a bit of a coffee mug addiction?  It’s true!  I’m not only hooked on coffee, I’m hooked on their vessels.  I particularly enjoy collecting handmade and handcrafted mugs. The mug/cup in the photo above is one of my most recent acquisitions from an art show.  It’s a mug by ceramic artist and educator Steve Hanson.  I totally adore his work!  He incorporates unique transfer images from the past into his ceramic works.  You can check him out on Instagram (@clayprofessor) or on etsy.
created the tag using a simple Tag Elements tag diecut from Fun Stampers Journey.  This pierced die makes for awesome stitched tags, but I opted to leave them HOLeY…hee hee…  I selected the retired (but now on Clearance for a super cheap price of $8.48 while supplies last) stamp set called Enjoy Coffee.  It’s a fun set that I will NEVER let go as I LOVE the beans, the fonts and the sentiments.  The mugs aren’t too shabby either.I stamped the tag using the coffee sentiment with Hazelnut Blend Fusion ink then distressed the edges with a Dauber Dowel and Oatmeal Cookie Fusion ink.  After that, I punched a Tag This punch out of Kraft Cardstock.  I stamped the “Stay Calm” sentiment onto Whip Cream cardstock using Hazelnut Blend Fusion ink then attached it and the tag with a Foam Square.  I tied a little Black Journey twine and Banana Cream ribbon onto the tag to finish it off.
 Just a little Journey Glaze to gloss up the coffee beans was the icing on the coffee tag!


Now let’s take a look at this week’s challenge sketch, shall we?!  

You have two options for this challenge so why not just go for it!  Make a CARD that incorporates the tag sketch or simply make a TAG.  Whatever you choose, we hope you have a ball creating and we would love to see what you make! Please make sure to include the hashtag #clcsipandshare in your social media post so we can find it easily!  Please add your link to the inlinkz below!


An InLinkz Link-up

PS...If you're interested, Check out our amazing CLEARANCE RACK that is almost sold out!

While you're at it, you might be interested in our BREAKING UP SALE.  SIX PAGES OF current products that will retire on June 30.  We've gotta make room for NEW goodies in our MASSIVE inspiration book!  

Sunday, February 19, 2017

Sunday Sip and Share...Tea Treats!

Hello there coffee loving friends!  It's Kerry here with another installment of Sunday Sip and Share. This week I thought I'd play around with a cute little bunny set that I just received.  It's the most adorable bunny set called Easter Wishes!  I paired it up with a fun little Note-velope die that allowed me to make a little tea-bag holder gift.  It'll be a perfect little treat in an Easter basket!
I stamped the stacked cups/bunny using Black Licorice Ink onto Whip Cream cardstock.  After coloring with my Color Splash Watercolor Pencils, I cut out the image and cut the all-in-one card/envelope with my Journey Platinum.  This is such a great die that's perfectly suited for a little treat bag treat!  
Isn't he cute?!?!  After coloring the little cups, I added some Journey Glaze and Sparkle Dust onto the heart and polka dots on the cups.  
In this photo, you can see the shimmer from the Brush Gold PanPastel.  I stamped the fun Easter Eggstravagant (eggs) stamp set using Pool Play Ink onto Pool Play Cardstock then rubbed some Brush Gold PanPastel over that with my finger.  I love how the PanPastel attaches itself to the ink and makes a gorgeous shimmery image.  
To finish the inside of the card, I stamped the eggs again with Pool Play ink.  I rubbed the PanPastel over that.  I stamped the sentiment on top using Black Licorice Ink.  Before closing the Note-velope with some Bubblegum Satin Ribbon, I tucked a pack of my favorite Bigelow peppermint tea inside. YUM!  
I hope you enjoyed seeing this little creation.  I'll be back again tomorrow to share a few more adorable projects created with this set!  Until then, let's check out the sketch for the week!  Since I created an all in one card/envelope, I hoped to create a sketch that demonstrates this aspect.  
We would love for you to join us in creating something fun that is inspired by this sketch.  Just link a photo of your creation to the inlinkz below.  At the end of the month, I'll randomly select a winner to receive a yummy coffee-loving prize!  

Sunday, January 15, 2017

Sunday Sip and Share...I Love You a LATTE!

Hello there!  I'm back with another yummy Sunday Sip and Share for Coffee Loving Cardmakers. I'm excited to share this card with you because the background and the cut elements were created during a live demonstration to many of my fellow FSJ coach friends.  While FSJ held an amazing Leadership event in Las Vegas (I couldn't attend), almost 200 other coaches got together online for our own little event.  It was so fun!  So although I couldn't attend the event in Las Vegas, I was able to distract myself by creating, collaborating, sharing and communicating with many amazing Coaches from around the USA.  

In the final day of our event, I demoed several different Mixed Media products that Fun Stampers Journey carries.  I LOVE my mixed media, so this was like taking a happy adventure while still in my PJ's!  My goal was to share different ways one can modify modeling paste and gesso to create fabulous texture and color.  When sharing live on video, I created some swatches of yummy goodness and this red background (and the blue elements) were the awesome result.  I knew exactly what I was going to use the background for...My CLCSipAndSHARE!    
To create the deelish textured background, I first rubbed Journey Modeling Paste over the Stained Glass Stencil on some Candy Apple Cardstock.  Before removing the stencil, I sprinkled some sand over the top.  I rubbed it into the modeling paste and then removed the stencil.  After rubbing off the excess sand with my finger, I splattered some watered-down Modeling Paste onto the panel.  I then set it aside to dry.  
Next, I moved on to adding color to some Journey Gesso with a sprinkling of Huckleberry Fusion Pan Pastel (I scratched some dust off the pan with my fingernail). After adding a little water and mixing the color in, I was able to brush this colored gesso over a piece of white cardstock.  It took just a few minutes to dry.  

I then splattered some Silver Silk onto the painted paper.  Blue and silver are just the perfect pair! Then I set it aside.  After the demonstration, I stamped the coffee image and sentiment (from the Hey Sugar stamp set) onto this painted panel using Black Licorice ink.  

Wrapping some Candy Apple Red ribbon around the panel gave it the elegance I was looking for.  I then cut out some pieces (a banner, a sentiment and the cup) and assembled my panel.  It was mounted onto a Whip Cream card base.  

I just LOVE how this card turned out.  The texture, the colors, the layout...It's fun, non-traditional and so very touchy-feely! 

I finished this challenge by creating the coordinating sketch for this card.  Want to join the fun sketch challenge?  Please do!  Just create a card that is inspired by this sketch and post a link to it on our link up below.  I'll be awarding one winner a special coffee-loving prize at the end of the month!  


Tuesday, December 13, 2016

Cocoa Treats...


The Coffee Lovers Blog hop is in FULL SWING!  Are you participating in the hop?  Make sure to check out my creations while you're hopping along.  I hope you find they absolutely delish!  

Today, I'm sharing a Cocoa-Loving project!  Yep!  I've got to since today IS cocoa's day to SHINE!!! 
Hey there cocoa loving friends!  It's I'm back with a yummy Cocoa treat package for you.  Since it's International Cocoa Lovers Day, I thought I'd join in with a little tasty treat!   I paired up the fun Cozy Wishes stamp set and the Planner Sketch stamp set with some Cranberry Bliss cardstock to create a yummy little pouch that contains some Cocoa-Mallow popcorn! The Black Licorice Ink is a trendy companion to the rich red cardstock, don'tcha think?!
I colored the cozy with my Copic markers.  I also added a few swirls of color around the stamped circles too.  It allowed for a bit more dimension and helped finish off that circle pattern.  The Gold disc (from Target), The Black Journey Twine, Jute and little strip of black and white fabric, as well as an itty bitty black button finish this fun package off!
It's pretty simple to make this tasty treat!  All you need is some fresh popped popcorn (I used packaged Orville Redenbacher's Microwave Butter Flavored popcorn), a package of Swiss Miss Hot Chocolate and a few spoonfuls of Kraft Mini Marshmallows.  Mix all this together in a bowl and shake the excess hot chocolate powder off.  You can use the extra to make a cup of creamy hot chocolate afterwards!  Package the popcorn mixture into a zip-top bag and insert into the gusseted tag opening.  I add an extra pack of hot chocolate too because popcorn and hot chocolate are a perfect pair!  

Thanks for stopping by my blog on this Winter Coffee-Loving Hop!  I hope you've been inspired by the many tasty creations that have been shared thus far.  I'll be back again tomorrow with another treat to share...Until then, I'm off to hop, hop, hop away!  

Sunday, November 20, 2016

Sunday Sip and Share

Hey there Coffee Loving stampers!  I'm getting excited for the Coffee Lovers Winter hop and decided to post a card today that features a yummy wintery set!  Take a peek:  
A little Boba tea?!  Oh HECK YEAH!  Do you like Boba tea?  I REALLY do!  I especially love my homemade Boba tea.  If you haven't had any, you should give it a try!  

I got a little spritzer-happy with my FSJ Electric Lime Color Splash too.  Don't you just love the yummy green color?  I think it pairs well with the Gold Silk and the Candy Apple Red Ribbon.  it makes a mighty fine holiday splash of color!  :)
To create this design, I stamped the Deco Dots background stamp onto the splattered page using a light touch of Black Licorice Ink.  I added a swirl of Black Journey Twine to the base, then I started stamping!  (FSJ Ink:  Pumpkin Bread, Rich Coral) diecut and applied the gingerbread man and the snowflake icon from the Cookie Exchange stamp/die bundle and then stamped the cup (from the Lemonade Sip SS-0259 set) using Black Licorice ink.  I colored the Boba with Copics making sure to include some yummy black tapioca pearls at the bottom of the glass.  I also added some Journey Glaze to give the glass some shine.
Just look at those yummy pearls!  So chewy and delish!  I created the "Mocha" Boba because, well, it's just delish!  The only thing that's missing is the whipped cream on top!  If you haven't tried homemade Boba tea before, give it a try!  
Now let's move on to the sketch.  I created this sketch to coordinate perfectly with this card.  I hope you find some time to play with it!  Heck, if you want, give this sketch a try and post your card during the winter blog hop.  It'll be quite fun playing "I SPY the CLCSIPANDSHARE sketches during my hopping adventures!  

If you choose to play along, please link your card up to our linky below.  When posting to social media, please make sure to include the hashtag #clcsipandshare so we can find your card easily.  

ALERT ALERT!  
Did you know that Fun Stampers Journey has launched a STEAL OF A DEAL promotion for new coaches?  Yes!  The new Designer Kit was created exclusively for the hobby stamper!  You know, the stamper that already has been bitten by the inky bug and has amassed quite an impressive collection of stamps, dies, tools and accoutrements!  Well, this kit was created for the stamper who wants to take advantage of the amazing Coach benefits  FSJ has to offer without worry of sales, sales and more sales.  Yes, this kit is perfect for the hobbyist...Perhaps that's YOU!  Take a look at the new Designer Kit offered now for the low sign-up price of $49.99.  
Not only will you receive the items listed above, you'll also receive 20% discounts on any and all products you purchase in your store.  You'll also receive Coach insider benefits!  If you're in the USA (and its territories), sign up today!  I'd love to have a few new coaches on my team!