Showing posts with label butterfly. Show all posts

Monday, February 6, 2017

February Bloom Box: Bold Wings is in the house!

Hello there inky friends!  WOOP WOOP!  I got my February Bloom Box in the mail today and I just HAD to ink this beauty of a stamp set up right away!  Forget about reading the directions and using the kit contents right now, I'll save those for the weekend!  

Check out the inaugural inking of my new BIG AND BEAUTIFUL Butterfly set!!!

Want to know how I created this beauty?  Alrighty, let's go!

I started out with a piece of Oatmeal Cookie cardstock.  I stamped the butterfly (offset) onto it using some Clear Pigment ink.  I then used some Journey Gold Embossing powder to emboss the butterfly. After that, I took some of my Pan Pastel in several colors:  Confectionary Days (4:00 and Center) and Rich Sorbets (2:00 and 4:00)

After rubbing the PanPastel onto the cardstock with my finger, I cut the butterfly out with my Detail Pro Shears.  I embossed a piece of Oatmeal Cookie cardstock using the Marrakesh Texture Plate and left just the bottom edge free from the folder.  I used a bit of the "minty" colored PanPastel for to colorize the embossed texture too.  After that, I mounted the butterfly onto this panel (making sure to just glue the right wing to the paper so there is a bit of lift to the left wing.  
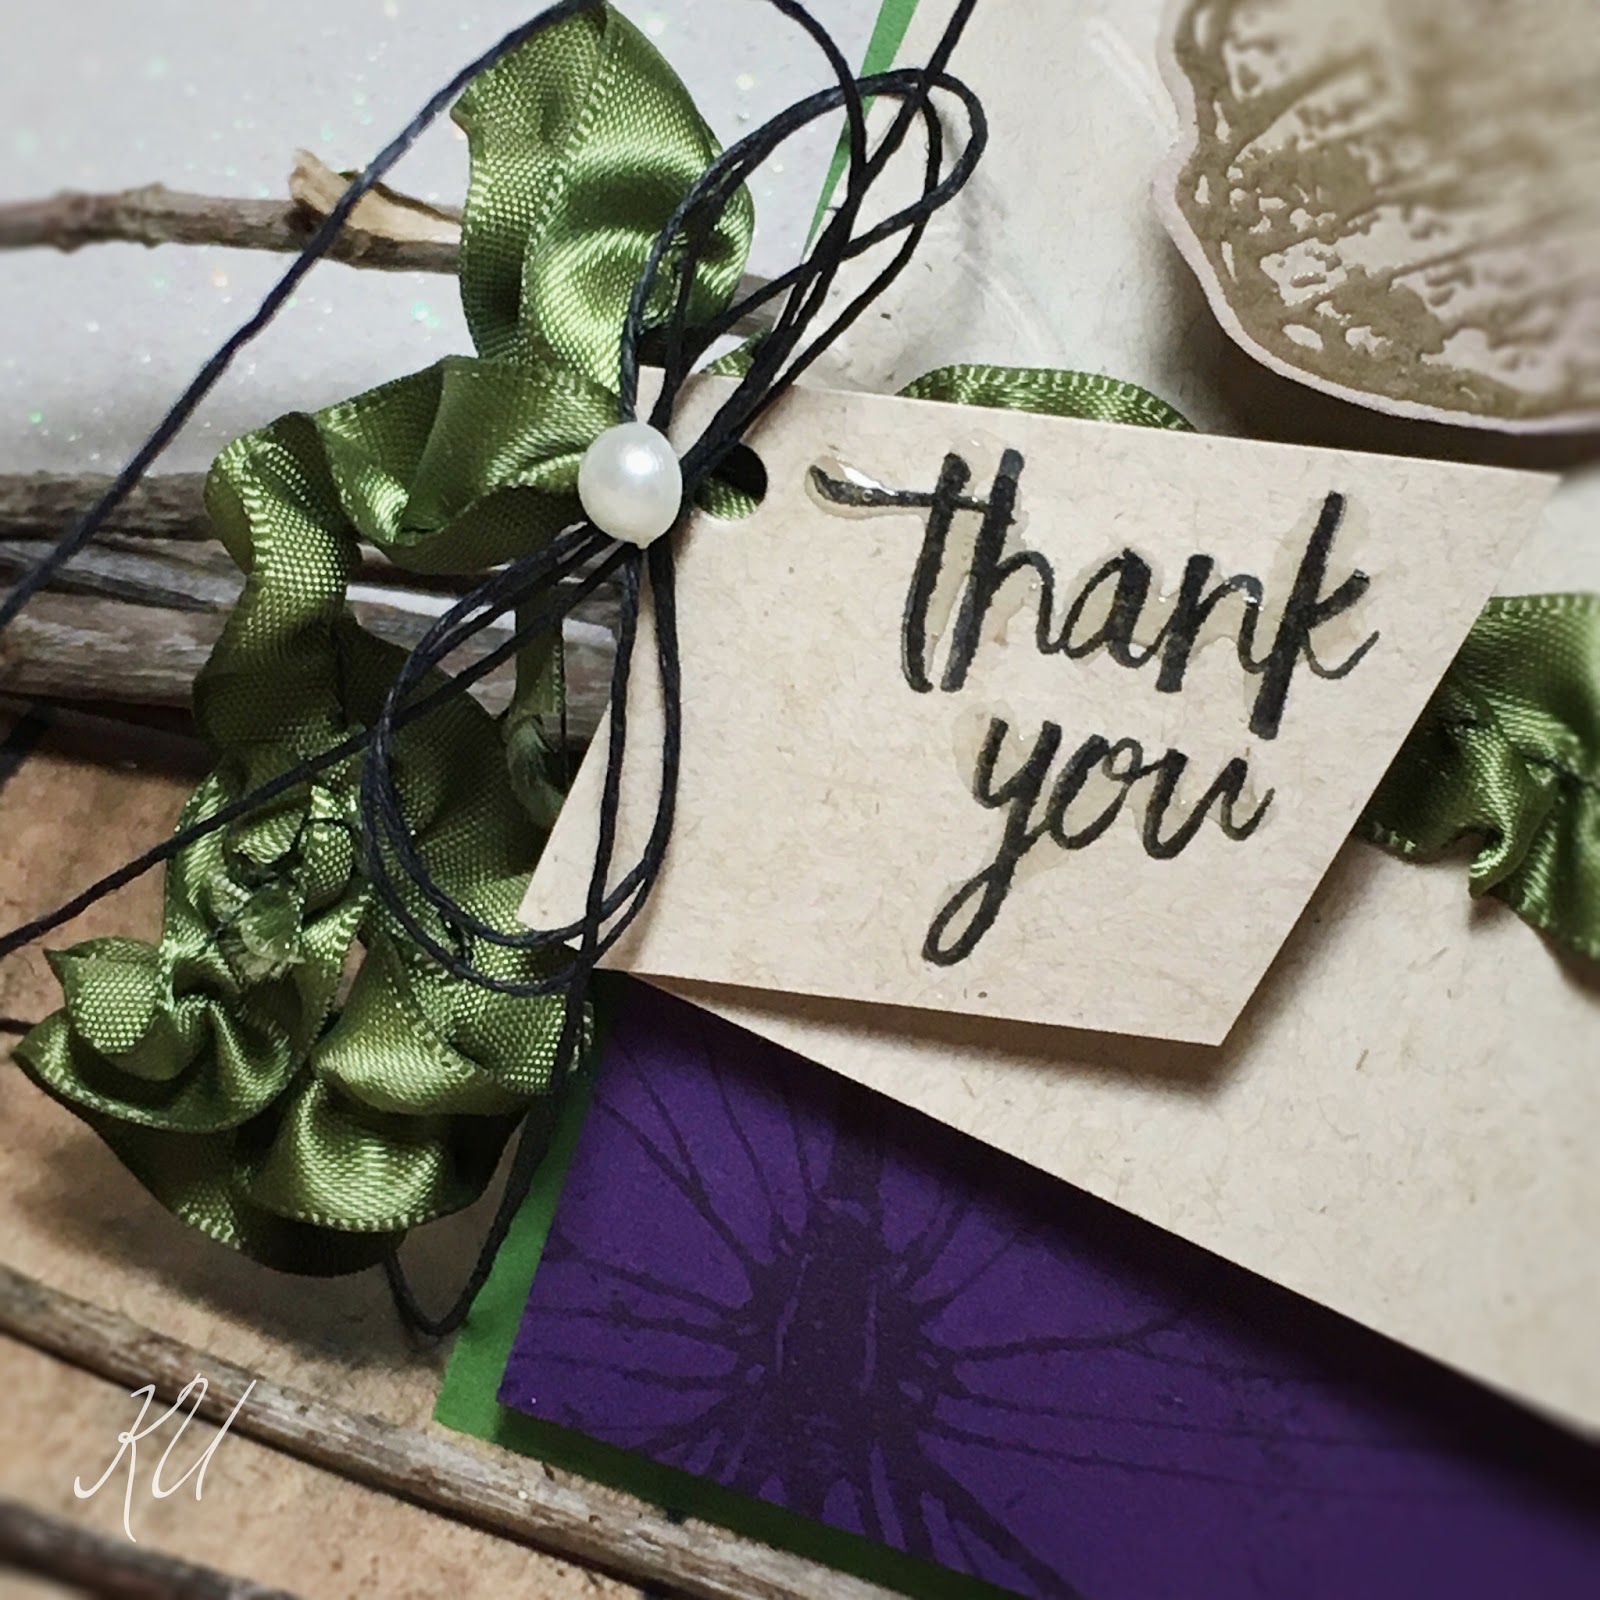
After that, I used my sewing machine to stitch over some Green Olive Satin Ribbon (On sale now!). I gathered the ribbon a bit by pulling one thread.  This piece of "puckered" ribbon was attached to the card panel using White Liner Tape.  I added a tie of Black Journey Twine to the ribbon so that I could attach the sentiment tag (stamped with Black Licorice Ink and covered in Journey Glaze).  A little Pearl finished the bow off.  

I took some Pretty Pansy cardstock and stamped the butterflies on the background cardstock  using the same color ink.  I attached the top Oatmeal cookie panel to this layer in a "wonky" layout, then mounted the whole thing to a Kiwi Slice Card base with some foam squares. 

Now I can't wait for the weekend so I can play with this kit some more!  Do you subscribe to the kit? If not, you're missing out!  Join the Bloom Box Kit club today!  

Friday, April 3, 2015

Butterfly Dreams...

Hello journey friends.

I spent some time in my stamping room last night creating my card for the sketch challenge I'm hosting at www.creativebloomsjourney.blogspot.com.  Each month there is a sketch and a color challenge.  It takes some time to get the colors in the mail (I order the papers and the inks each month to match the color challenge) so while I wait for those, I work on projects using the sketch.  It also helps pass the time as I wait patiently for the Kit of the Month!

Speaking of the Kit of the Month, I noticed that the colors I selected for the color challenge will work perfectly for that set!  WOO!!!  I'm excited about that!!!

So let's get on with the show...Here's the sketch:
And here's my card:
I love triptych cards!  The main images come from the Gifted Wings stamp set.  They were stamped onto Buttercream cardstock with a retired brown ink.  I also used the Newsprint background (stamped on Oatmeal Cookie Cardstock with Oatmeal Cookie ink) and the little stripes from the Banner Party set. To color the butterfly, I used some chalk pastels with a Q-Tip.  I finished the image off by using Copics to create dimension and added color.  
Looking closely at the edges of the panels, you'll notice I added some Antique Gold Rub-n-Buff.  I love that stuff!  A little goes a long way and when it's rubbed on the edge of the paper it creates a beautiful shine in the light. I added some sparkle too...Just because I LOVE sparkle.  :)
Here you can see the way I layered my three panels.  The middle panel was glued directly to the center of the card front panel.  The two side panels were popped up using foam dots.  I also distressed those edges with Rub-n-Buff.  
I applied taupe seam binding to the card front, then attached it to a Deep Lilac A2 card base I glued the sentiment circle to the top of the bow to complete the card.