Today I'm beginning the massive share of a selection of projects I created to submit to Richard Garay's Designer Showcase. I was excited when he announced the call and started working on some special projects immediately. I compiled all my projects into a gallery on my team FB page (JOIN TEAM ITCHIN INKERS TODAY!) so that I could get the input of my fellow team members who would then vote on the ones I should submit. It was important to me to get their input and was my first stage in my project submission process.
First, I'll be sharing the projects that "Made the Cut" by my team. Although I LOVE all of the projects I proposed for this call, I could only submit two cards and one scrapbooking design, so I am so grateful to my team for helping me make the final decisions! After the three projects are entered tonight, I'll be back tomorrow to share the projects I created that "didn't make the cut". So pop back over tomorrow to see them. As with all of my project shares on my blog, I will share ONE PROJECT PER POST as they will include my creative process and additional photos.
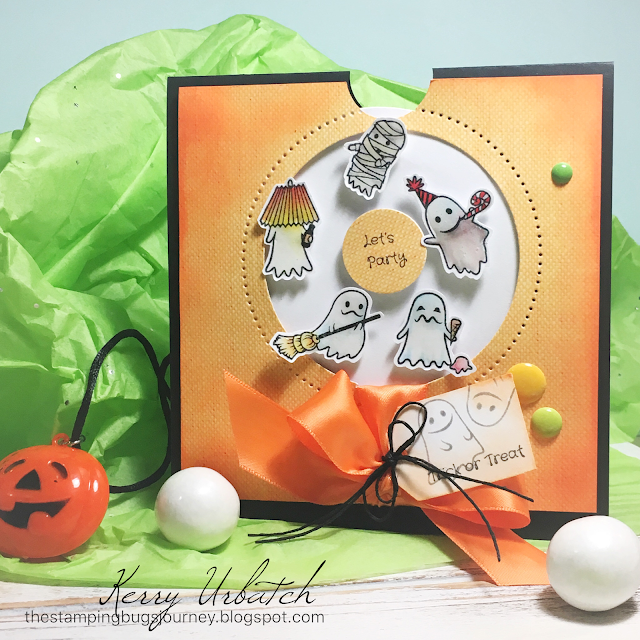
So here's CARD #2. It's a fun little interactive card that was a hit with my team. I was worried about this card and was not quite sure whether to submit it in my gallery or not...but they decided...THIS WAS TO BE SUBMITTED...So I listened.
Want to see it in action??? Here goes (please disregard sound)
This was quite fun to create!
I started out by coloring the ghosts from the new Party Ghost Stamp Set with Liquid Color. After they were colored and fussy cut (yes, there is a stamp and die bundle for this adorable set), I added some Small Foam Squares to the back. I then diecut a large Journey Circle (with pierced element added) onto the Pineapple-Smoothie Canvas- like paper from the Mystic Romance Prints Collection I also diecut another circle using Whip Cream Cardstock so that I could use that as a spinner base.
I laid the cardstock (distressed with Orange Rave Ink and a Dauber) onto the Black Licorice Card Base and punched a hole with my 1 1/4 inch circle punch. I removed the orange cardstock and attached the Whip Cream Circle to the top flap of the card base using a small brad. I tested out the spin action and then attached the Citrus Cooler Satin ribbon and then the ghosts. I finished off the card by adding a punched circle with the sentiment (I cut the sentiment so that each word would stamp separately and so that I could stack the words instead of have them read as a complete sentiment horizontally). One more test run and it worked again! WOOP WOOP! Next was to add the Journey Glaze onto the ghosts to make the paper a bit more sturdy...Wahoo! Spin that wheel!
After the glaze was dry, I attached a tag (Tag Time Punch) and a few stamped ghosts (I used River Stone for a lighter gray image) and the sentiment using some Black Journey Twine and a few Sweet Candy Drops finished the card off.
All of the materials used in this project can be purchased in my shop. Just click the items mentioned in my text and you'll go directly to my shop! :)


That card is amazing and very clever!!! I don't really like Halloween but this is awesome! I'd want to make one too just like it!
ReplyDelete